How to Install a Flagpole

- Shovel or post hole digger
- Ready-mix concrete
- Plastic wrap, duct tape, tar paper or asphalt paint
- Bucket or wheelbarrow
- Level (at least 12” long)
- Screwdriver (to attach the cleat)
- Pipe wrench or hex wrench (to attach pulley truck depending on design)
- 3 wooden wedges (depending on your flagpole model)
- Landscape rocks
- Playground sand
- Flagpole and included hardware
Safety tip: Before you start digging, you’ll need to know where utility lines may be located underground. Call 811 or visit call811.org before you plan to start your project.
If you recently purchased a flagpole or are planning on buying one soon, you have probably wondered how to install it on your own. With the correct tools, a little patience, and keeping safety in mind, installing your own flag pole can certainly be a DIY task. This guide will help you to install aluminum and fiberglass flagpoles (with external halyard) from 20-80ft only. If your flagpole is made from a different material or is taller than 20-80ft, consult a guide that is designed for your specific flagpole. Remember, before you start digging you should find out where utility lines may be buried. You can call 811 or visit call811.org before you plan to start your project.
First, choose a location in your yard or garden or commercial property where you’d like your flagpole to stand. Imagine not only what the flagpole will look like to passersby but also how it will look from inside your house. Keep in mind any trees in the surrounding area or any trees you plan on planting in the future, and make sure the flagpole is far enough from your house that you can fly a large flag without it hitting your roof. Plant your flagpole away from any overhead power lines as well (your unfurled flag must be at least 10 feet away from these lines), and check with your city and or community association to make sure your plan won’t be in violation of any zoning laws or deed restrictions.

Next, you’ll need to prepare the ground. Dig your foundation hole to be at least 3 or 4 times the butt diameter of the flagpole. You can use a post hole digger to break the ground and work easily into the soil. The hole should be several inches shorter than the foundation tube so that the foundation tube slightly sticks above grade. Standard flagpole footing depth will be 10% of the overall flagpole height (20’ flagpoles are 22’ overall, 30’ flagpoles are 33’ overall, 80’ flagpoles are 88’ overall and so on). Foundations should be set in undisturbed dry soil and not unstable fill.
Place the foundation tube inside the hole. You’ll need to brace the tube so that it doesn’t move during your next step. You can do this by pouring a small amount of gravel or landscaping rocks on the outside of the tube. Use a level to make sure that the foundation tube is plumb so that your flagpole stands straight.

When the ground sleeve is secure, prepare and pour your concrete. Stir the concrete mix in a bucket or wheelbarrow then and pour around the foundation sleeve tube, being sure not to get any inside of the ground sleeve tube itself. Pour concrete to the top of the hole, completely filling it. Use a concrete trowel to even the surface. Make sure the ground sleeve tube is still plumb. The concrete will need to cure for 24-48 hours before you install the flagpole.
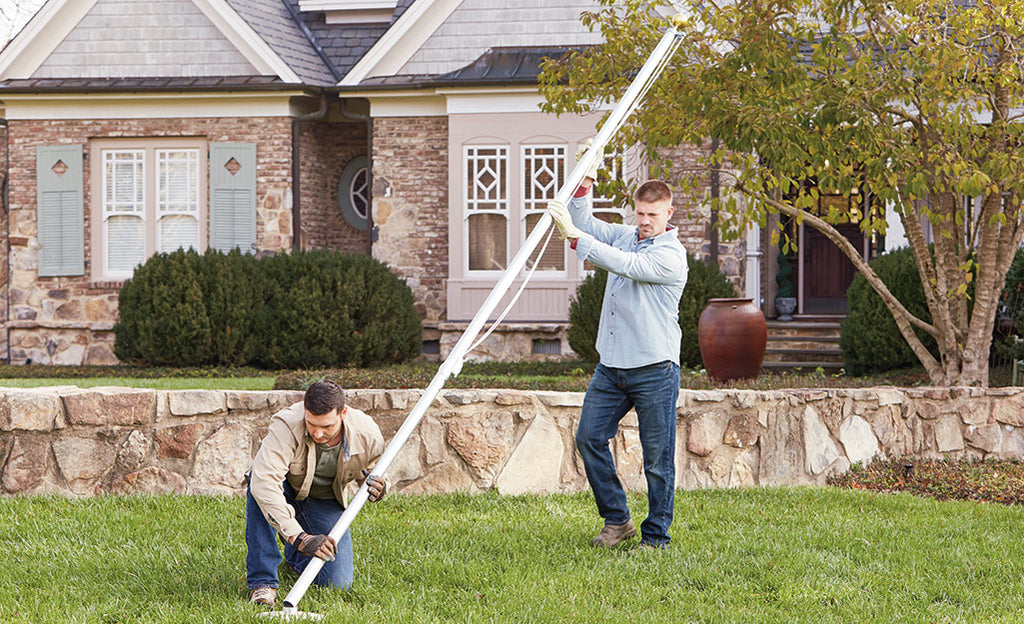
Once the concrete has cured, you can assemble and install the flagpole. Follow included instructions for the assembly of your flagpole. If your flagpole comes with a base collar that covers the sleeve be sure to put it on the flagpole before you erect it. The ball (or finial), pulley truck, and rope must also be secured on your flagpole before it is erected. Once the flagpole is assembled, install it into the foundation tube.
Once the flagpole is installed and plumbed in the sleeve, place 3 wood wedges around the flagpole to hold it plumb in the sleeve (aluminum residential flagpoles with a 3” or smaller base diameter do not use wood wedges as these are a direct fit into their ground sleeve). After you have confirmed that the flagpole is plumb, pour playground sand between the flagpole and sleeve. Tamp it down or use a little water to get the sand to settle. Remove the wood wedges and seal off the top few inches with silicone weather caulk or a mixture of the cement to ensure that the sand does not wash out. If cement is used, you must have a barrier of tar paper, plastic wrap, or asphalt paint as a barrier between the aluminum flagpole and the cement so that no lime in the cement touches the aluminum. The lime in the concrete will eat away at your aluminum and could cause structural failure over time.
Important Note: Flagpoles over 25 ft tall will require a lift truck or crane to safely lift the pole. Ensure that, during installation, the pole does not get close to or touch any overhead power lines.
Finally, raise your flag. With the included gear, you can now raise and fly the flag of your choosing. Once your flagpole is installed, you can plant around it or build a low wall to enhance its surroundings. Happy flying!
Note: The preferred location of the rope/halyard knot is between the snap hooks. Loop the rope/halyard through the ring end of the snap and then around the snap end of the snap hook. Your flagpole may come with a spare rope/halyard.